Remote Access Using WireGuard & TigerVNC
In an era of rapidly evolving technology, many parents who didn’t grow up with modern devices often need help navigating new advancements. When parents live far away, offering this support becomes more challenging. A secure and efficient remote access system can bridge this gap, allowing for support and troubleshooting. This guide walks through how to set up such a system using WireGuard VPN and TigerVNC, ensuring remote connections are secure and effective without sacrificing performance. In this example, the user has a Unifi Dream Machine they are using as their gateway router so the Unifi OS interface is used for the local network configuration.

Step 1: Set Up WireGuard VPN on the UDM
Wireguard is used as the preferred VPN protocol because of its lightweight and speed efficiency providing a more ideal solution than OpenVPN.
Access the UDM Interface
1. Open Your Web Browser:
- Enter the IP address of your UDM in the address bar (e.g.
https://192.168.1.1). - Log in with your credentials.
2. Navigate to the VPN Settings:
- In the UDM interface, click on
Settingsfrom the left-hand menu. - Go to
VPNunder theServicessection.
3. Create a WireGuard VPN Server:
- Click on
Create New VPN Server. - Choose
WireGuardfrom the list of VPN options. - Configure the following settings:
- Name: Name your VPN (e.g., "Home WireGuard VPN").
- Private Key: This will be auto-generated. You don’t need to change it.
- Public Key: This will also be auto-generated. Keep it as it is.
- Listen Port: Set this to a standard WireGuard port (51820 by default).
- VPN Subnet: Define a subnet for VPN clients (e.g.,
10.0.10.0/24). - DNS Servers: Enter your preferred DNS servers (e.g.,
1.1.1.1and1.0.0.1for Cloudflare,8.8.8.8and8.8.4.4for Google, or whatever your preferred DNS servers are).![[vpnServerSetup.png]](../../../../img/remoteaccess/vpnServerSetup.png)
4. Add a Client:
- Scroll down to the
Clientsection. - Click
Add Client. - Enter a name for the client (e.g., "MacBook Pro").
- Public Key: This will be generated once you configure the WireGuard client on your local Mac (covered in Step 2).
- Pre-shared Key (Checkbox): Enabling this option adds an additional layer of security by requiring a pre-shared key (PSK) for the connection. The PSK is another key that is used in conjunction with the public/private key pairs for the WireGuard tunnel. This is optional but recommended for enhanced security.
- Remote Network Access (Checkbox): Check this box only if you are wanting the remote client to have access to your local network resources. (Note: For instances where you're simply trying to help remote aging loved ones with their computers, they do not need access to your network so you wouldn't check this box.)
-
Get Client's Configuration File: Download or Scan QR Code for Client's Configuration File so that it is accessible on the remote macOS machine.
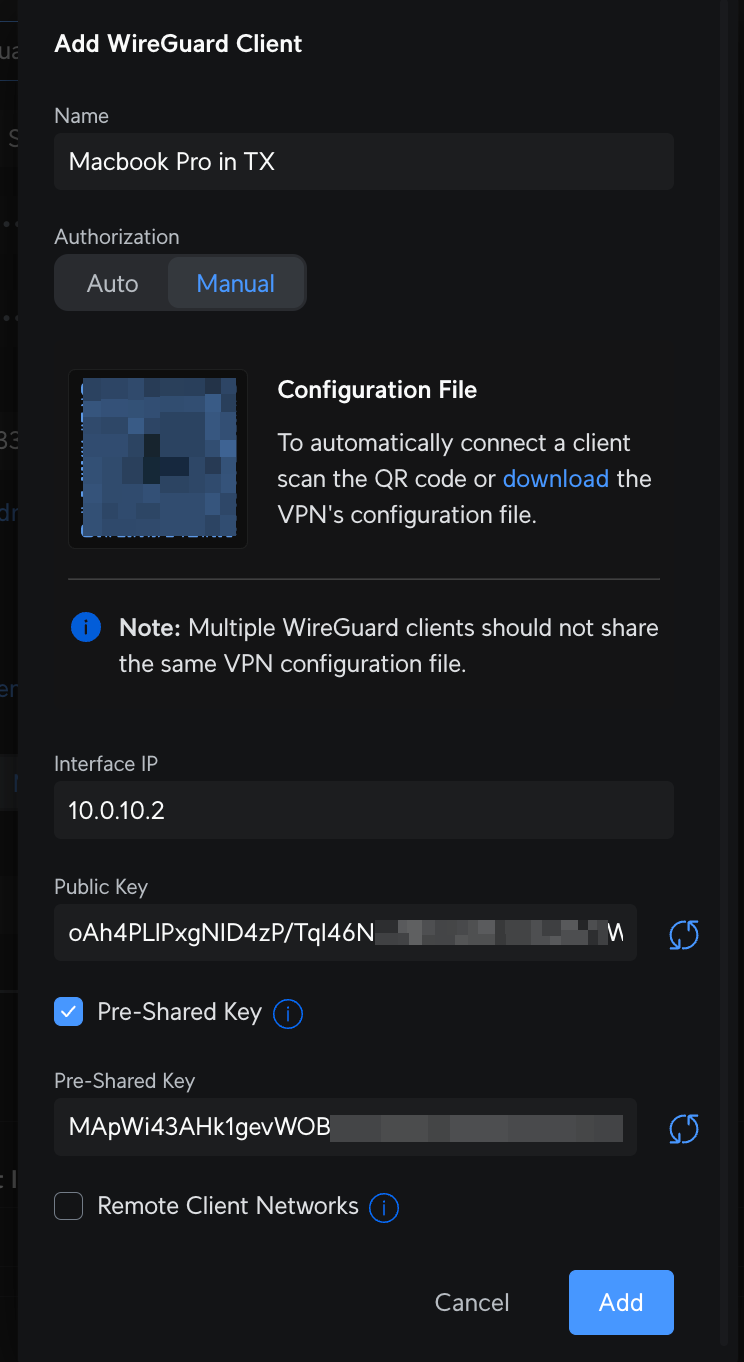
-
Add the settings.
6. Finalize the VPN Setup:
- Review your settings and click
Addat the very bottom left to create the WireGuard VPN server. - Take note of the
Server Public Keyand theEndpoint IP Address(the public IP address of your UDM). These items will be noted in your downloaded client configuration file.
Port Forwarding (if necessary)
- If your UDM is behind another router, forward UDP port 51820 to your UDM’s internal IP address to allow WireGuard connections.
Step 2: Configure WireGuard on the Remote macOS Machine
1. Install WireGuard Client:
- Download the WireGuard client for macOS from the WireGuard website or initiate download from the App Store.
- Open the downloaded
.pkgfile and follow the on-screen instructions to install WireGuard on your Mac.
2. Set Up WireGuard on macOS:
- Open the WireGuard app from the Applications folder.
- Click on
Import Tunnels from Fileand select the configuration file you downloaded and saved when you set up the VPN Server on the UDM. - Click
Allowwhen asked if you want to add the configuration.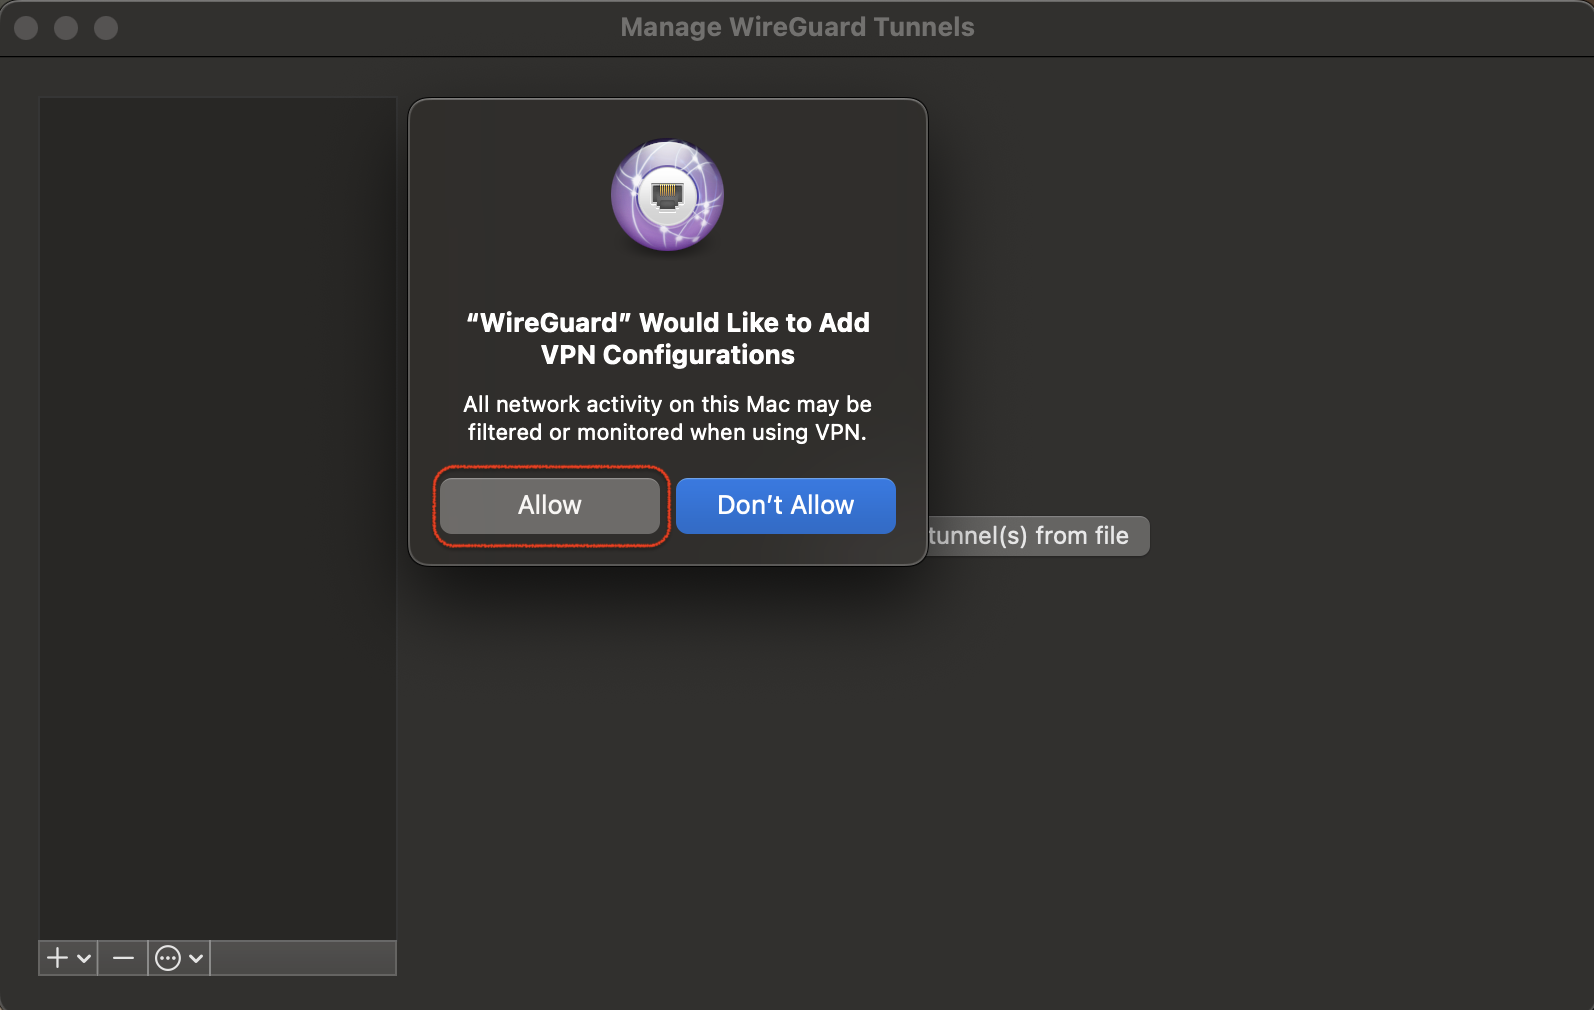
3. Save and Activate the VPN:
- Save the configuration and toggle the switch to activate the VPN.
- The status should show
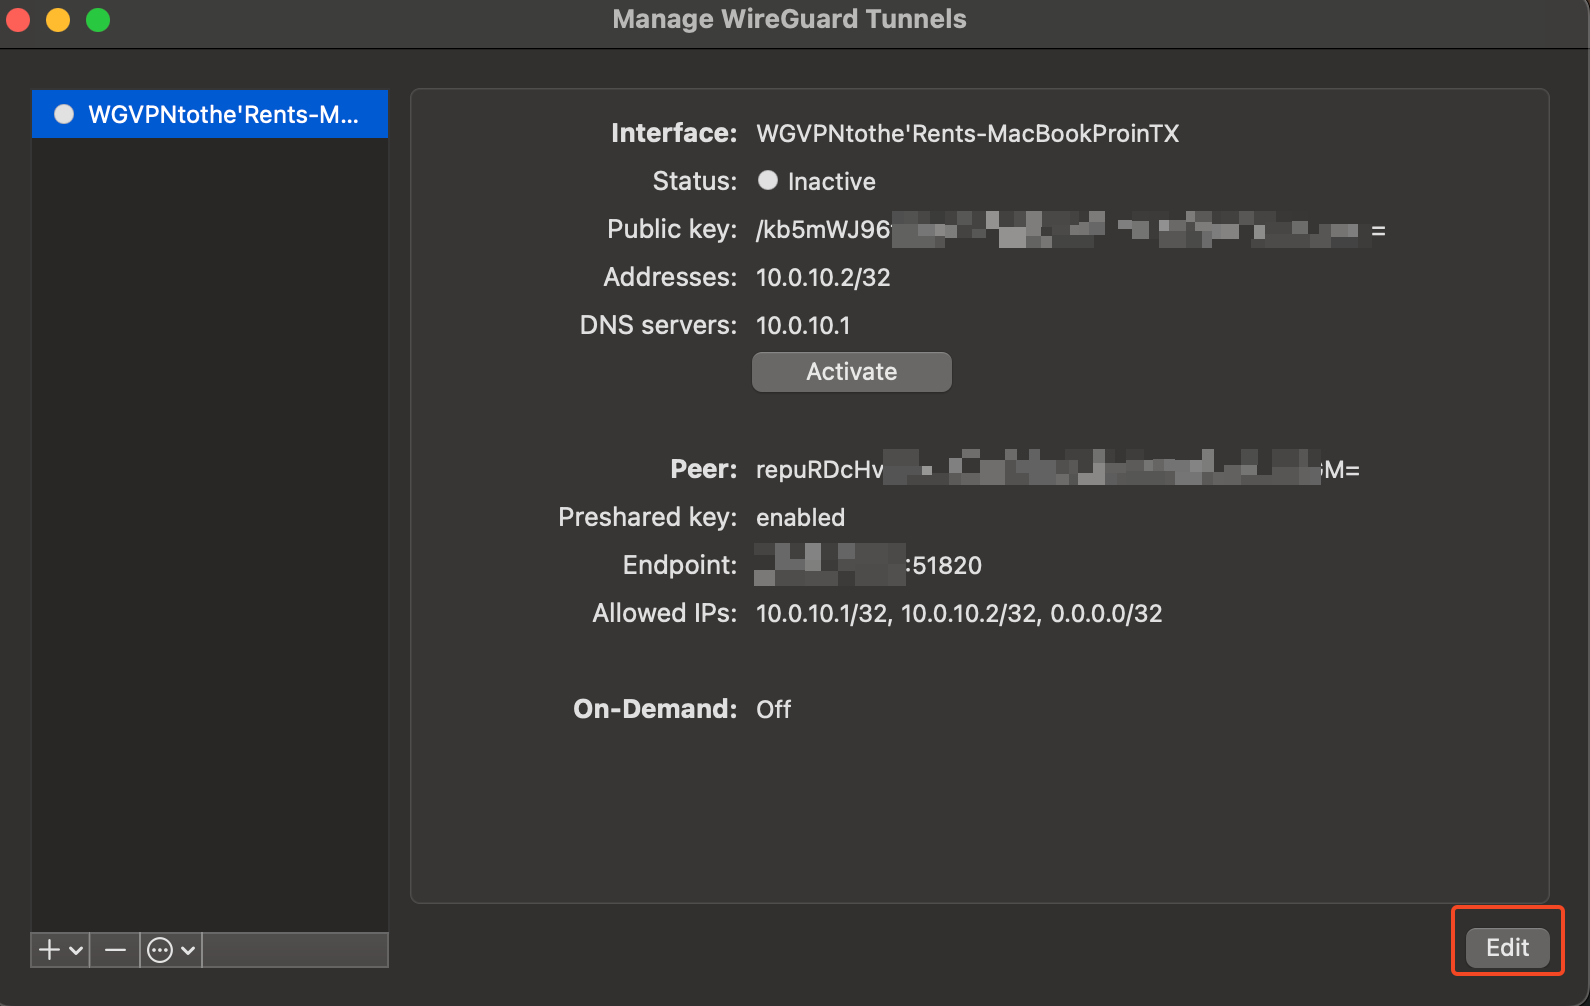
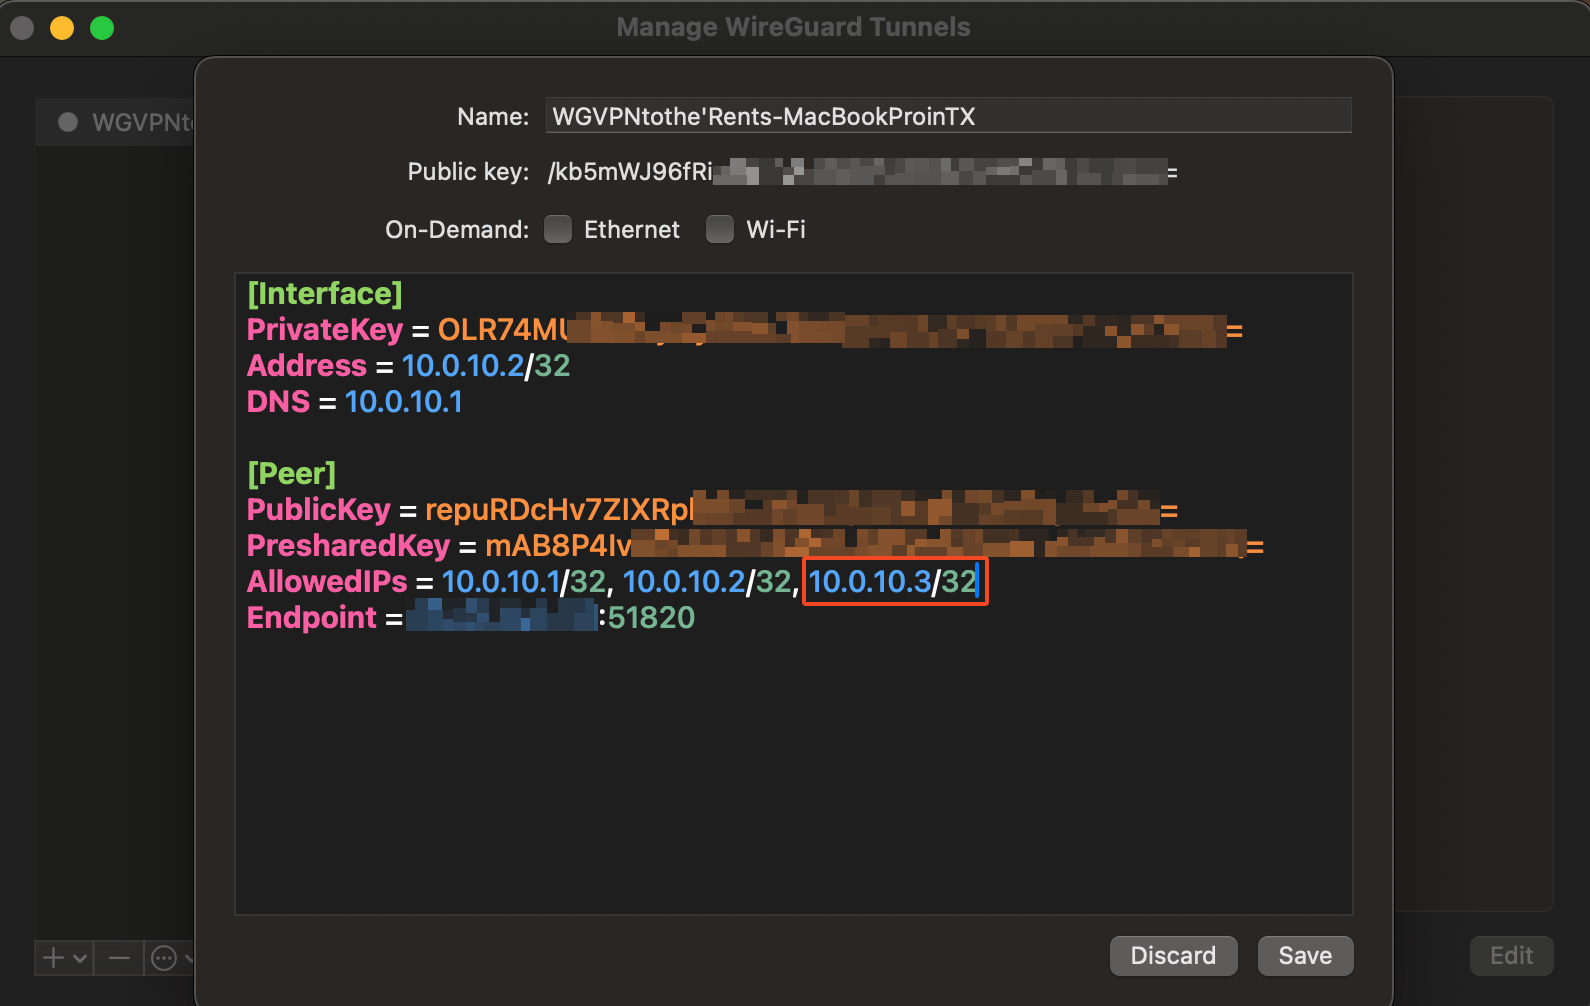
Activeif the connection is successful.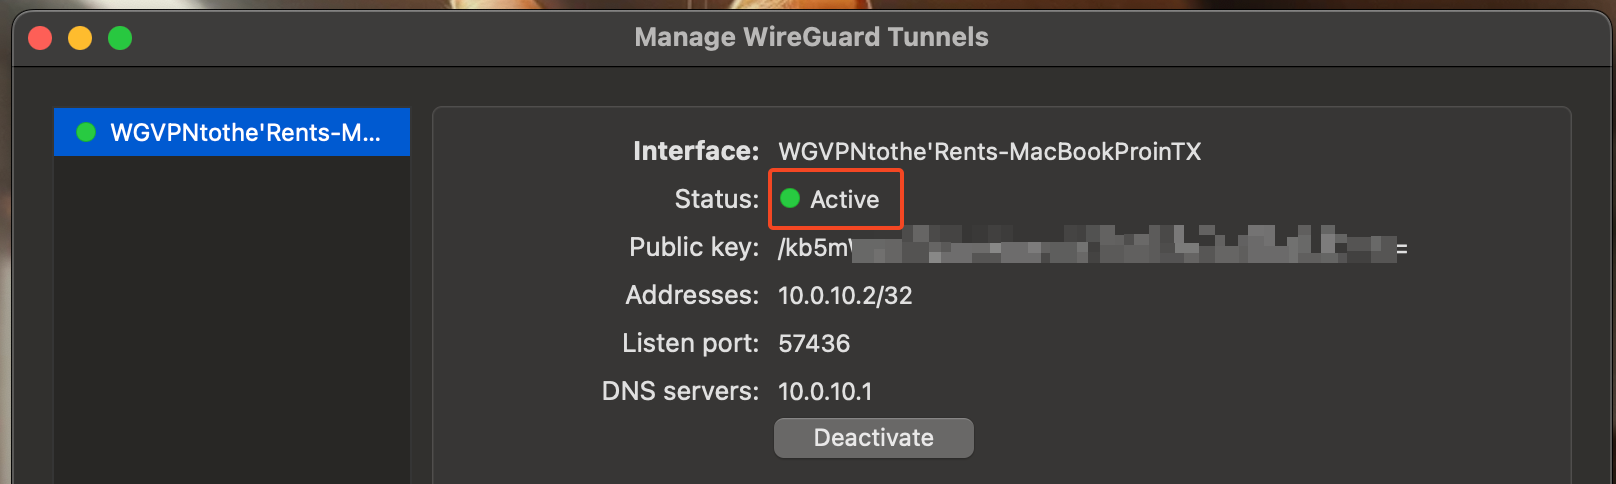 3a. Note: You may want to change the configuration to only include the local Mac's IP address rather than all (
0.0.0.0/0). This will be more secure and will also avoid routing all traffic through the VPN.
Step 3: Enable Screen Sharing (VNC) on the Remote macOS Machine
1. Access System Preferences:
- On your remote macOS, go to System Preferences> Sharing.
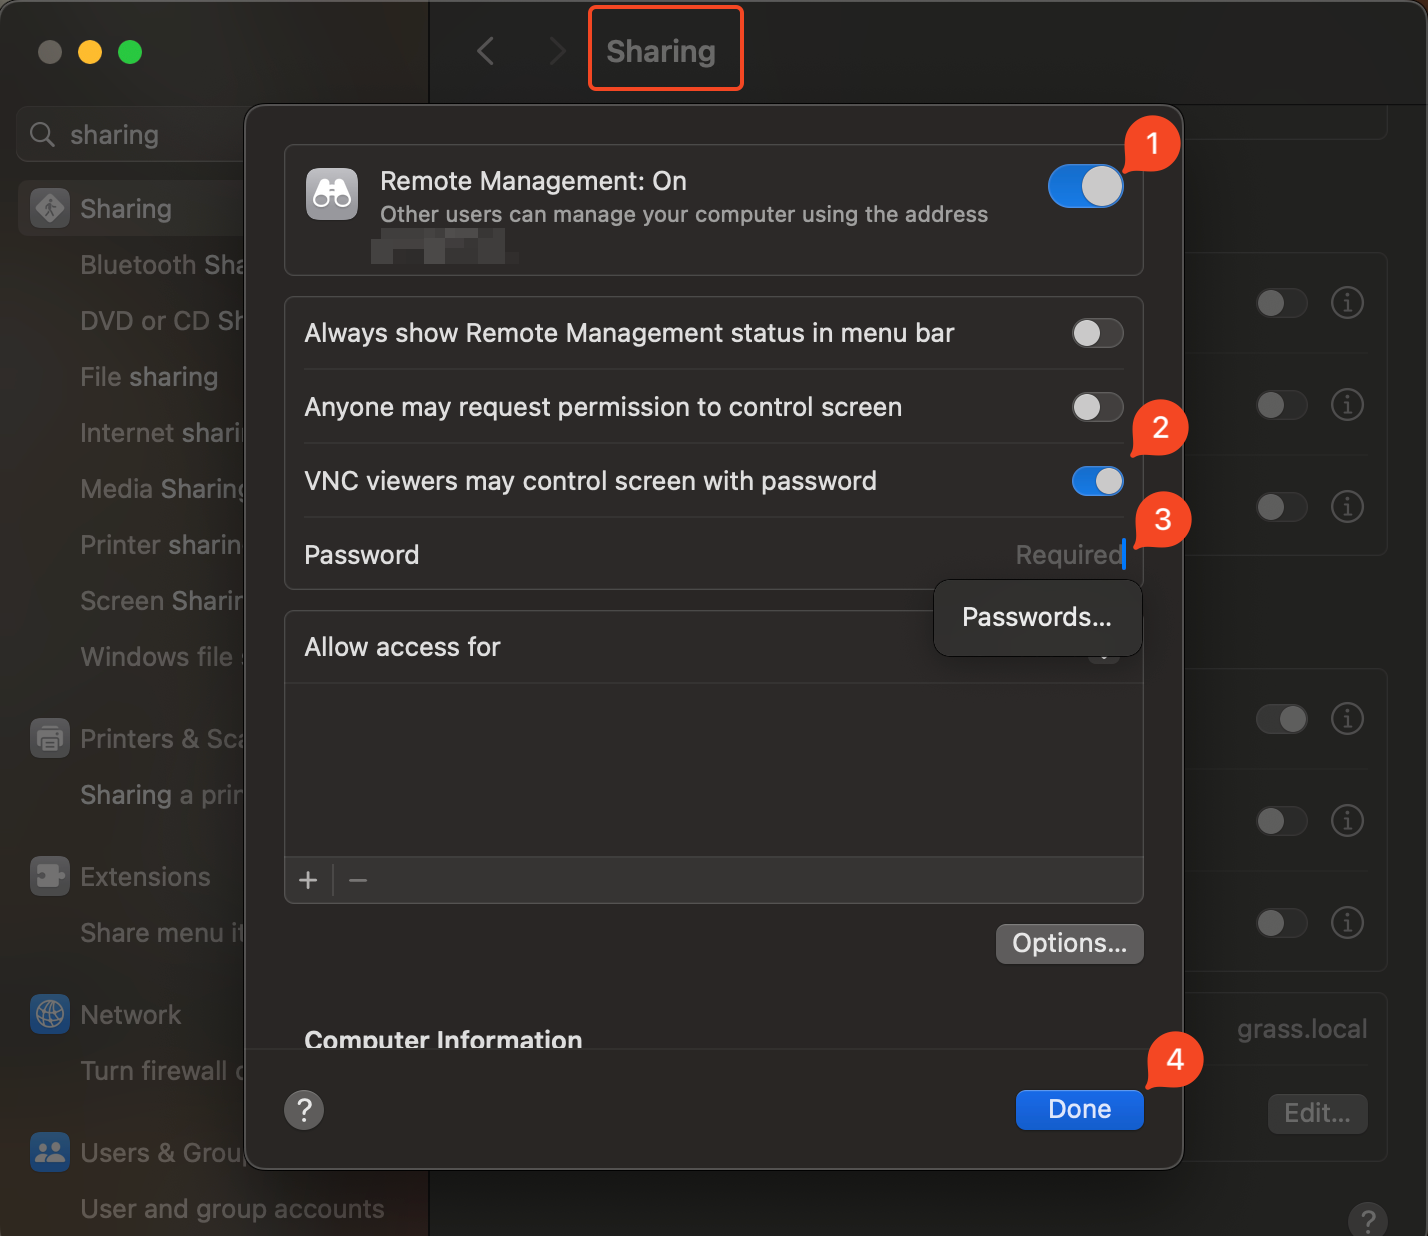
2. Enable Screen Sharing:
- Check the box next to
Screen Sharingin the left-hand menu. - Click on
Computer Settings…and enableVNC viewers may control screen with password. - Set a strong password that you will use to authenticate your VNC session.
3. Note the Remote macOS Machine’s Local IP Address:
- Still in the
Sharingsettings, note the local IP address of your iMac, which is displayed under theScreen Sharing: Onmessage (e.g.,192.168.1.2).
Step 4: Set Up TigerVNC on the Source Mac (Local Machine)
1. Download and Install TigerVNC:
- Visit the TigerVNC Downloads page and download the
.dmgfile for macOS. - Open the
.dmgfile and drag the TigerVNC Viewer to yourApplicationsfolder.
2. Launch TigerVNC:
- Open the
Applicationsfolder and double-clickTigerVNC Viewerto launch the application.
3. Configure the VNC Connection:
- In the
TigerVNC Viewerwindow, enter the local IP address of your iMac followed by the VNC port (e.g.,192.168.1.2:5900). - Click Connect.
4. Authenticate the Connection:
- When prompted, enter the VNC password you set on the iMac.
- Click
OKto establish the connection.
5. Interact with the Remote Desktop:
- You should now see the iMac’s desktop on your source Mac, and you can control it as if you were physically present.
Step 5: Additional Security and Maintenance
1. Security Best Practices:
- Keep Software Updated: Regularly update the WireGuard app, TigerVNC, and macOS to protect against vulnerabilities.
- Use Strong Passwords: Ensure that both your WireGuard VPN and VNC access are protected with strong, unique passwords.
2. Monitoring and Logging:
- Monitor Access Logs: Regularly check the UDM and macOS logs to monitor for unauthorized access attempts.
3. Tuning Performance:
- Adjust VNC Quality Settings: In TigerVNC, adjust the quality and compression settings based on your connection speed for optimal performance.
- Optimize WireGuard Performance: Ensure that your WireGuard server and client are configured to use modern encryption methods for the best speed and security balance.